
Technology
If you’re going to take online coursework you’ll need more than a notepad and pencil. For starters, you’re going to need a computer, a webcam, access to the Internet, and some basic computer skills.
This module is your chance to get your tech affairs in order. You’ll have a chance to determine your computer specifications, test your Internet connection, and learn a few things about getting around your computer and the Web.
NOTE: Click the triangle to expand and collapse the content.
Equipment
For an online course, you’ll need a computer with a webcam, a microphone, speakers, and whatever else might be specifically required by your course. And yes, you can still have a notebook and pen by your side for taking notes. To satisfy the online part, you’re going to need a fast and consistent Internet connection so you can surf the Web all the way to your online course.
Computer
As you probably guessed, online learning requires you to be online! So let’s talk about the equipment you need. We recommend a desktop or laptop computer. Yes, you may be able to get online using your phone or tablet, but certain online activities and software applications may not work as well on those devices. Phone and tablet screens are smaller, which may make it more difficult for you to see finer details of videos and text. Also, many students find it preferable to type their papers on a computer instead of on a phone or tablet. If you want to go the tablet route, great, but you’re also going to need a computer that was made in the past three years.
Activity: Check your computer configuration
UNCG does not have a required set of computer specifications for students, but the ones below would be a good start. Of course, it’d be a really good idea to check with the department of the course or program you’re interested in to see if they have any specific requirements.
| Screen Resolution | 1920 x 1080 |
| Processor Speed | 2.5 GHz |
| RAM | 8GB |
| Hard Drive | 256GB |
| Ethernet | 10/100/1000 Integrated |
| Wireless | 802.11 a/b/g/n |
| Bluetooth | Bluetooth 4.0 |
| Sound | Speakers and headphone/mic jacks |
| USB | 1 USB 3.0 port |
| Camera | Yes |
| OS | Windows 10 or better / Mac OSX 10.13 High Sierra or higher |
To display System settings including your operating system, processor speed, and RAM:
Windows 10
Right click on “Start Menu” and click on “System” in the pop-up menu to open the “System” window. Alternatively, you can type “System Information” in the Cortana search box, and select “System Information: Desktop App” from the results.
Windows 8.1
Open “System” by swiping in from the right edge of the screen and tapping “Search” (or if you’re using a mouse, pointing to the upper-right corner of the screen, moving the mouse pointer down, and then clicking “Search”). Then enter “System” in the search box, and tap or click “System.”
Windows 7
Open “System” by clicking the “Start” button ![]() , right-clicking “Computer,” and then clicking “Properties.”
, right-clicking “Computer,” and then clicking “Properties.”
Windows Vista
Open “System” by clicking the “Start” button ![]() , clicking “Control Panel,” clicking “System and Maintenance,” and then clicking “System.”
, clicking “Control Panel,” clicking “System and Maintenance,” and then clicking “System.”
Windows XP
Open the control panel by clicking the “Start” button ![]() , clicking “Control Panel,” clicking “System,” and selecting the “General” tab.
, clicking “Control Panel,” clicking “System,” and selecting the “General” tab.
If you’re looking to get into the nitty gritty, follow the same instructions as above and then click “Device Manager.”
To view system information about your Mac:
- Click the black Apple at the top left of your screen
- Select “About This Mac.”
On the “Overview” tab you’ll see your computer’s information, including your operating system, processor speed, and RAM. The “Storage” tab will display how much hard drive space you have. If you’re looking for really detailed information, click on “System Report” under “Overview.”
Webcam
Some online courses require that you create videos or participate in online meetings. To complete these tasks, you’ll need to have and use a microphone, headphones or speakers, and a webcam. If you’re not sure if you have one or if the one you have actually works, fear not! We created a tool that will allow you to check if you have a functioning webcam and mic. If all is good, you’re good. If not, don’t worry. A webcam/microphone combo, along with a pair of headphones, costs about $50.
Activity: Check your webcam and microphone
Click the links below to test your video camera (also called a webcam) and microphone. When the pages open, follow the instructions to test your video camera and mic.
Internet Connection
If you’re considering taking an online course, you want to make sure that your Internet connection provides upload speeds of at least 5 Mbps and download speeds of at least 15 Mbps. These types of speeds are available with certain types of broadband connections such as cable and fiber. Still, let’s have a look at all your broadband options.
Satellite. There are a bunch of satellites orbiting the earth that transmit signals sent from your Internet Service Provider (ISP) to a satellite dish at your house. This type of broadband is most common, and most useful, for serving remote or rural areas. Upload speeds are typically less than 3 Mbps, and download speeds (on a clear day without any interference) can reach 25 Mbps, though they are generally much less than that.
Digital Subscriber Line (DSL). There are a handful of DSL technologies that provide access to the Internet using telephone lines. The one most often used by residential customers is called Asymmetrical Digital Subscriber Line (ADSL). This type offers download speeds around 9 Mbps and upload speeds around 1 Mbps (though speeds will decrease the further you are from the telephone company’s facility). The good news, there is a new DSL technology called G.fast that is slowing becoming available. It offers fiber-like speeds over existing phone lines.
Cable. Cable Internet connections are much faster than satellite and DSL. Most ISPs offer packages with download speeds between 30 Mbps and 100 Mbps, and upload speeds from 2 Mbps to 20 Mbps. Actual speeds will depend on the package you purchase, the modem you use, and the traffic on the network. Still, if you have Cable Internet access you’ll be in good shape for taking an online course.
Fiber. Fiber optic broadband connections are currently the fastest way for the average consumer to connect to the Internet; providing upload and download speeds up to 1 Gbps (it’s really fast). It’s not available everywhere, and typically not available in remote or rural areas. If you have fiber Internet your connection is plenty fast for taking online courses.
Whichever option you choose (or have access to) just know that a connection that has less than 5 Mbps up and 15 Mbps down may cause load time issues when you view certain web pages, play multimedia content, or participate in online video discussions. So how fast is your connection? Let’s find out.
Activity: Check your Internet connection speed
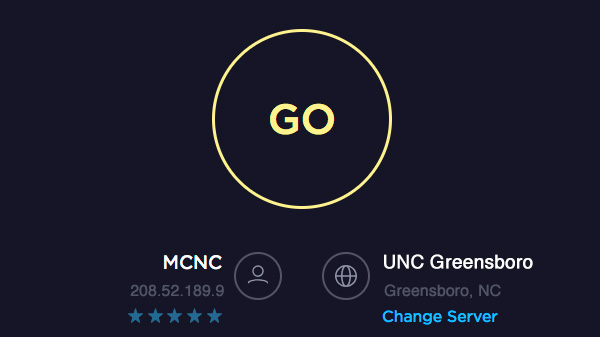
To find out how fast your connection is, fire up the computer you plan on using for your coursework, head over to Speedtest, and click “GO”.
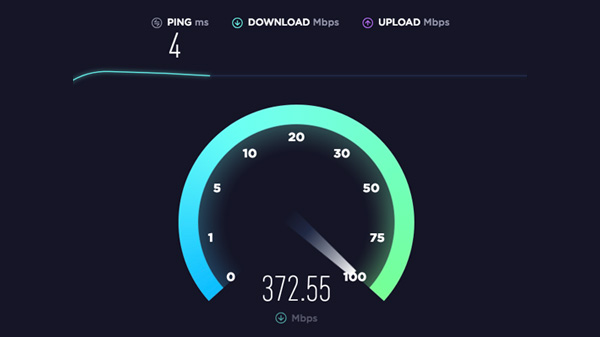
The speedometer will display your download and upload speeds as the application tests your Internet connection.
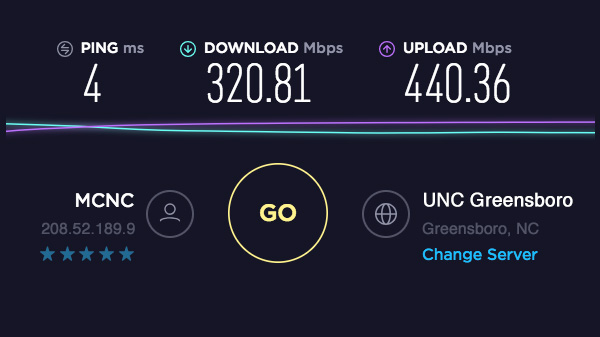
When the test is finished, your download and upload speed results will be displayed at the top, and your IP address and ISP provider will appear in the bottom left corner. If either speed test is below 5 Mbps, you’re going to need to find another, faster way to connect to the Internet. Keep in mind, modems, wifi routers, other computers using your connection, and even weather can alter the highest achievable speed of your test.
Web Browser
A web browser is a software application used to search the Internet. Most of us use web browsers every day to search for information (psst…you’re using one right now). When you take an online course it is likely you will run into a situation where the software or website you need to access is not compatible with the browser you are using. To plan for this you should install more than one browser on your computer (don’t worry, they’re free), and ensure they are kept up-to-date.
The most common web browsers are: Google Chrome (PC/Mac), Mozilla Firefox (PC/Mac), Safari (Mac only), and Microsoft Edge (Windows 10 PCs). While there are many others out there such as Opera, Camino, and Torch, the aforementioned are the most common and most compatible browsers.
Nevertheless, it is advisable to have more than one installed on your computer, just in case the site you are using is not compatible with your favorite browser. Each browser offers add-ons and tips and tricks to help enhance your browsing experience. We will only highlight the most common browsers, but if you visit the homepages of any browser, you will find links to their standard and add-on features.
Here is a list of the most common browsers and links to information about getting the most out of them.
Activity: Explore different web browsers

Computing Skills
In many cases, you might use a technology in an online class that you haven’t used before, be it a website application, some new piece of software you have to install on your computer, or that webcam you’ve yet to take out of the box (though after the previous section I hope it’s up and running). Whatever the technology may be, you’re going to have to be comfortable working with your equipment so you can focus on your studies.
Internet Skills
The fact that you’re reading this sentence leads me to believe that you’ve mastered the basics of using the Internet. So, let’s move on to some intermediate tasks that you’ll want to conquer.
Activity: Bookmarking a web page
Pick your browser from the tabs above, and let’s create a bookmark for this web page.
Use your mouse
- Visit the page you want to bookmark
- Click the Star icon on the right-hand side of the address bar
- Name the bookmark and select a folder to place it in
- Click “Done”
Use a keyboard shortcut
- Visit the page you want to bookmark
- Press Ctrl + D (PC) or Command ⌘ + D (Mac)
- Name the bookmark and select a folder to save it in
- Click “Done”
NOTE: To see all of your bookmarks, type the following into your address bar: chrome://bookmarks/
For more information on using bookmarks in Chrome, visit Google’s support page.
Use your mouse
- Visit the page you want to bookmark
- Click the star in the right-hand corner of the browser
- Click “Bookmark This Page”
- Name the bookmark and select a folder to save it in
- Click “Done”
Use a keyboard shortcut
- Visit the page you want to bookmark
- Press Ctrl + D (PC) or Command ⌘ + D (Mac)
- Name the bookmark and select a folder to save it in
- Click “Done”
For more information on using bookmarks in Firefox, visit Mozilla’s support page.
Use your mouse
- Visit the page you want to bookmark
- Click the “Add To”
 icon in the top right-hand corner of the browser
 - Click “Add Bookmark”
- Name the bookmark and select a folder to save it in
- Click “Add”
Use a keyboard shortcut
- Visit the page you want to bookmark
- Press Command ⌘ + D (Mac)
- Name the bookmark and select a folder to save it in
- Click “Add”
Visit Cult of Mac’s resource guide for more information on using bookmarks in Safari.
Activity: Clearing cache, cookies, and browser history
Cache. A cache is a repository for stored data used to speed up the process so that data doesn’t have to be fetched each time it is requested. Internet browsers cache web pages by storing a copy of your visited pages and then using that copy when you return to the page. (Source: PC Tools)
Internet cookies. Cookies are small files that websites put on your computer so they can remember your preferences or so you don’t have to sign in each time you visit certain sites. Some cookies, though, may put your privacy at risk by tracking sites that you visit. (Source: Microsoft)
Browser history. Your browsing history is the information that your browser remembers and stores on a computer as you browse the Web. This includes info you’ve entered into forms, passwords, and sites you’ve visited, and it helps make your browsing experience better. (Source: Microsoft)
What does all this mean? Periodically clearing your web browser’s cache, cookies, and history may prevent or resolve performance issues (e.g. account login issues or web page loading issues). On the flipside, when you completely clear out the information saved in your web browser you’ll also lose information such as saved passwords so be sure to pay attention to what you’re deleting. To get a better understanding of the process, find your browser in one of the tabs above and follow the instructions provided.
- Open a new tab and type the following into your browser bar: chrome://settings/clearBrowserData
- Select a time frame
- Select what you want to delete
- Click “Clear browsing data”
- Select “History” from the browser’s menu
- Select “Clear Recent History”
- Select a “Time Range to Clear”
- Choose what you want to delete
- Click “Clear Now”
NOTE: For Safari 8
- Select “Safari” from the browser’s menu
- Select “Clear History and Website Data”
- Choose what you want to delete and click “Clear History”
Activity: Playing a media file
Many instructors utilize audio and video files in their online courses. If you’re going to listen or watch these files, you need to ensure that your browser is set up to play the file.
The most common file types you’ll encounter are:
- Audio: MP3, WAV, WMA, and OGG
- Video: MOV, MP4, and M4V
The good news about browsers and media files is that they’ll let you know if you’re missing the software required to play a file and will usually provide a link to get the necessary program.
Let’s take a moment to make sure you can play three of the most common file types: MP3, and MP4. Click a tab above to begin.
Click the play button (the triangle) to listen to the MP3 audio file of some instrumental music.
Click the play button (the triangle inside the circle) to watch the MP4 video file.
Activity: Change Screen View (zoom)
Ever visit a web page where the text was really small? Or perhaps too big? Or perhaps someone messed with your browser and you can’t figure out how to reset the view so instead you just throw your hands up and continue to use your browser even though you could easily fix the problem with the push of two keys? Well, let me introduce you to three keyboard shortcuts.
Zoom in
Hold down the CTRL (PC) or Command ⌘ (Mac) key and press the + (plus) key
Zoom out
Hold down the CTRL (PC) or Command ⌘ (Mac) key and press the – (minus) key
Reset the zoom
Hold down the CTRL (PC) or Command ⌘ (Mac) key and press the 0 (zero) key
Go ahead and practice zooming in and out. When you are finished, reset the zoom like you know how (because you do).
Working With Files on Your Computer
In a face-to-face class, instructors hand out sheets of paper that you can tuck away in a folder and save for later. In an online class, instructors will replicate this process digitally by posting a file on a website, like Canvas, and then you have to save that file to your computer for use later on.
Activity: Working with files
The process of downloading files will differ slightly depending on your browser and how you’ve setup your browser. We’ll try out two different approaches and you can decide which one works best for you.
Option 1: Left click
Yes, it’s that easy. Well, mostly. Left click the link, and the browser will either download the file to a default location (which you’ll need to know so you can locate the file later) or it will ask you where you’d like to save the file.
For this option, just left click the link below:
Download and read RTL Practice Document
Option 2: Right click
When you right click a link a menu of options will appear. You’re looking for an option such as “Save target as,” “Save link as,” or “Download linked file as.” Once you select this option, you’ll be asked where you want to save the file.
For this option, right click the link below, select “Desktop” from the menu on the left, and click “Save.”
Great! You’ve downloaded a file to your computer. Now how do you find it so you can open it? The answer to this question depends on how you downloaded the file.
Option 1: Open the browser’s default download folder
If you left clicked the link to the file and let the browser download it to the default location, the file will most likely be in a “Downloads” folder.
PC Users
In Chrome, Firefox, or IE, you can press CTRL + J to open the “Downloads” folder.
Double click the file to open it
Mac Users
In Firefox or IE, you can press Command ⌘ + J to open the “Downloads” folder.
In Chrome, you can press Shift + Command ⌘ + J to open the “Downloads” folder.
In Safari press Command ⌘ + option + L to open the “Downloads” folder.
Double click the file to open it
Option 2: Open the folder you selected when you downloaded the file
If you went with the right click option, then you chose where to save the file. If you followed the instructions in the previous tab, you saved the file to your Desktop. If you didn’t, you’re going to need to locate the folder you where chose to save the file.
From time to time you may need to install an application for a course you’re taking. Perhaps your instructor holds meetings via Skype or maybe that History 100 website doesn’t work on any browser except for Chrome. Whatever the case may be you’re going to want to know how to install a program.
To get some practice, click one of the links below to install Skype or Google Chrome on your computer.
Install Skype by clicking the link below and follow the instructions for your device.
Click here to install Skype
Install Chrome by clicking the link below and follow the instructions for your operating system (Windows, Mac OS, or Linux).
Click here to install Google Chrome
Troubleshooting Technical Issues
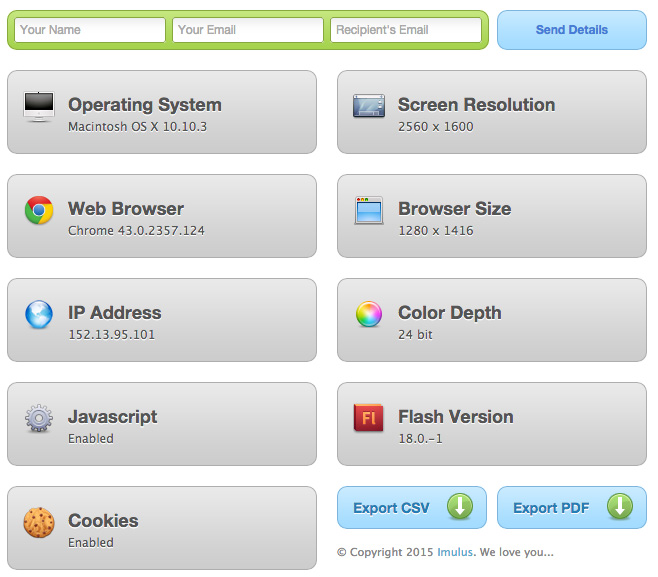
Don’t you just hate it when things break? Lucky for you, UNCG has a great support group over at 6-TECH. If you need their help, you’ll want to be able to provide them with some basic information about your problem and your computer.
Activity: Submit your computer information
Activity: Search the Web for a solution
Say you’re working on coursework in the middle of the night, and the page you’re trying to access isn’t loading properly. You click the link. Nothing. You refresh the page a million times. Nothing. Before you begin to panic, let’s talk about another approach: solving the problem on your own.
- Visit your favorite search engine (e.g. Google, Yahoo, DuckDuckGo, etc.)
- Type your problem (e.g. “Page doesn’t load”)
- Scan and review the results for one that fits your circumstance
- Follow the directions provided
Granted, this approach won’t work every time, but you’ve got to at least give it the old college try, especially when there’s no one else around to help.
Technology @ UNCG
To facilitate learning at UNCG, we use a small handful of tools: Canvas to deliver your coursework, Google Apps for web-based collaboration, Zoom and Google Meet to bring you, your instructor, and your classmates together in real time, and Box for storing files in the cloud. Take a moment to get familiar with these tools as you’ll be using them should you pursue online classes at UNCG.
Canvas
Canvas is the Learning Management System (LMS) used by UNCG. It’s where you’ll go to access your courses, take tests, check your grades, have discussions, and access other content for your course. Needless to say, it is your first stop when you go online to work on your course.
There’s a lot of great information on Canvas out there. Instead of overwhelming you with specifics, let’s keep it simple.
Activity: Getting to know Canvas
1. Watch this video.
2. Visit and bookmark this the Canvas help guides
3. Visit the Canvas Student Tour course we’ve set up for you to learn more about Canvas.
Google Apps
iSpartan is UNCG’s version of Google Apps for Education (GAFE), a collection of web-based collaboration tools, including email, chat, calendaring, word processing, and spreadsheets. These tools work through a web browser on a desktop or laptop as well as through apps on most mobile devices. When you enroll as a student, you’ll receive an iSpartan account to access Gmail and other related Google Apps (such as Calendar, Docs, and Sites).
- To learn more about the various Google Apps used at UNCG, visit iSpartan’s home page.
- If you’d like to take Google’s tour visit Google Apps.
- If you need a break, go play PAC-MAN.
Zoom Resources at UNCG
Zoom uses virtual classrooms, rooms, and meeting spaces to allow you to attend classes, meetings, office hours, or one-on-one consulting sessions online. With Zoom, instructors can chat with students, have students virtually raise their hands for questions, share their computer screen or a particular window with students, use a webcam, and a bunch more. Better still, Zoom can be used and accessed from a desktop computer or a mobile device!
For more information visit Zoom’s Joining & Starting page.
Activity: Zoom System Check
If you want to use Zoom, your computer must meet the minimum specifications required by the folks at Zoom. Take a test drive on any device using the link below. If you can access the meeting, you’ll be able to access any Zoom session you’ll encounter at UNCG. Click to test a Zoom meeting on your device
Box
Box is a file management service that allows you to collaborate with other users and sync your files across devices and from the Web. No more thumb drives. No more emailing files. No more trying to figure out which computer or which collaborator has the latest version of the file. Want to know more? Watch the video and click the links below.